Monday 29 October 2012

DT Project #1 showcasing Christmas Cottage Collection by Theresa Collins (posted by Lesley)

Hellooooo lovely Snazzy visitors!

I hope all our UK friends enjoyed their extra hour's sleep yesterday morning, lol!  Unless, like me you wake after a certain number of hours no matter what the clock says.  

Anyway, I've been having some happy time in my craftroom finding ways to use the lovely DT goodies we were sent by our equally lovely 'Bosses' this month.  This month we were sent a gorgeous set of papers, die cuts, stamps and brads called the Christmas Cottage Collection by Theresa Collins and  today I'm sharing another home decor idea.


To any novice crafters out there this was my very first attempt at decorating candles ....... ahem...... who's saying 'looks like it too', lol.  Seriously though I've had those candles at least two years which I bought specifically to have a go at decorating but never got round to trying it until now.  I won't say I found melting the tissue into the wax particularly easy but I'm sure I would get better with a bit more practice......  and I only got a couple of tiny wrinkly bits, ;D!  It was fun to try as well.


 I stamped the wordy Christmas tree from the Christmas Cottage Collection stamps four times onto tissue paper alternately using Bundled Sage and Aged Mahogany Disress Inks, wrapped the tissue around the candle then covered with a piece of greaseproof paper which was big enough for me to hold together with my hand while I used my heat gun to  melt the wax sufficiently to 'absorb' the tissue paper.  I moved the greaseproof paper around the candle until I had heated all the way round.  I then added some tiny star gems here and there and finished off with a band of one of the Christmas Cottage Collection papers punched with a tree border punch.


For the second candle I used the pretty snowflake and the tiny word stamps from the set and again finished with a punched paper border.  The teeny snowflakes cut by the border punch I stuck to the candle here and there adding tiny gems to the centres.

Well, that's it from me today but I have another project for you later in the week which moves away from the home decor items.  I hope you get chance to pop back then and don't forget if you would like to be in with a chance to win some of the Christmas Cottage Collection goodies leave a comment HERE on Gillian's post.

Have a Happy Monday and see you later.


Friday 26 October 2012

Design Team Project #3 .... Distressed Old Bird

Hey Snazzy followers it's time to share my third and final project this week using the Christmas Cottage Collection by Teresa Collins .... meet the "Distressed Old Bird"


For todays project I started out by using the Studio 490 Birds With Wings Art Part Set which has been covered with the Medallion cardstock from the collection, I then stamped the "music notes" from the Christmas Cottage Clear Stamp Set in Archival Ink (Coffee). I adhered the paper using Cosmic Shimmer Glue


I inked the cog which is from the Steampunk Gears & More Art Parts Set with Distress Ink Festive Berries then stamped the star image from the Christmas Cottage Clear Stamp onto the brad which is from the Decorative Brad Set. The hat is from Blossom Bucket Embellishments by Studio 490 which I have coloured using Treasure Gold (Onyxite).


As with the steps above I used the reverse cardstock from Doily Trees, stamping the "25" image again from the Christmas Cottage Clear Stamp Set this time using Archival Ink (Jet Black) then adding some Tim Holtz Ideaology.

For the legs I cut out cardstock from the collection (Countdown & Tiny Flowers) again adding some Tim Holtz Mini Gears. The wooden base was inked with Distress Ink (Gathered Twigs) and highlighted with Treasure Gold (Renaissance).

I hope you have enjoyed the christmas decor ideas this week, don't forget to leave a comment HERE if you want to be in with a chance of winning this months random comment draw prize.

Until next time stay inky. X


Wednesday 24 October 2012

Design Team Project #2 ... A Christmas Cottage

Good morning Snazzy followers ... today I'm back sharing my 2nd project of the week ..... "A Christmas Cottage" featuring the Teresa Collins Christmas Cottage Collection.


I have used various bits n bobs from the Tim Holtz Ideaology Collection


12x12 cardstock (reverse of Tiny Flowers)


Thanks for stopping by and leaving a comment, .... I will be back on Friday with my last project of this month.  To be in with a chance of winning this months random comment prize, be sure to leave a comment HERE.

TFL X


Monday 22 October 2012

Design Team Project #1 Featuring Teresa Collins ....

Good morning everyone ..... Gillian here to kick start our next design team collection (and oh what a beauty it is) .... firstly though a huge *Hello* to all our new blog followers thanks for stopping by and leaving us all such lovely comments.

The winner of last months random comment is #15 .....


which consides with a comment left by Butterfly aka Alison .... congratulations Alison please can you e-mail your details HERE

So onto this months collection .... we are using the beautiful Christmas Cottage Collection by Teresa Collins along with the co-ordinating stamp set.


My first project this week is using a Paper Mache Hanging Board (my fav item to alter) which is available from Snazzy's

I started out by painting the board with Fresco Paint (Toad Hall) then layering the following papers from the collection (Sentiments & Tiny Flowers).


I then added a layer of metal wire which was coloured using Fresco Paint (French Roast). I then stamped the "Christmas Tree" from the clear stamp set using Memento Ink (Rhubarb Stalk) onto a die cut from the 12x12 Double Sided Die Cut Accessories Sheet.

I die cut the Snowflake Rosette with the "Music" cardstock and attached the brad which is from the Decorative Brad Set.


The little metal snowflake which is available in a set from Snazzy's was highlighted using Treasure Gold.


To decorate the back of the board I have used Fresco Paints (Toad Hall & French Roast) with a Crafters Workshop Stencil & Treasure Gold to highlight.

Thanks for stopping by and leaving a comment to let me know you have been here .... don't forget if you leave a comment on this first post you will be entered into the random comment draw which will be drawn on the 26th of November. Good Luck everyone.

I will be back later in the week with some more projects to share. TFL x


Friday 19 October 2012

Hallowe'en Part 2 By Hels

Goooooodly Morning Snazzyfans, tis I, Hels, back again with my other Hallowe'en project for this month.  I have concentrated on the Hallowe'en Blueprint stamps for this project because the other one was mostly about the Carta Bella All Hallow's Eve papers.  Did you know that you can buy the DT kits we get sent (not the actual kits we have because they wouldn't be full... I shall shut up now)  HERE are all the deets on how to get your inky mits on them... and if you buy them together there be a discount to be had too!  Oh and while I think on, did you know the Snazzy website is getting fuller so do pop over to see what goodies are there... and it is being added to regularly too!  HERE is a linky for that one.


So, being as I am in a spooky kind of mood, I decided to stick with the 3D decoration thing that I have going on at the moment.  The base is a wooden shadowbox which is approx 8" square so you have an idea on the sizing of my project.  The base was given a quick coat of Eggplant Dabber and then I used some Crackle Medium and bobbed a coat of Pitch Black Dabber over the top.  My Crackle stuff is ancient so the crackles are a bit disappointing, so I grabbed a scratchy tool and scrubbed a bit... well, it is sort of crackled.   The insert is some Tim Holtz Paper and I dripped some Red Pepper and Pitch Black Alcohol Ink down inside it so it looked a bit more spooky, like spiders blood or something.


I filled up some Corked Vials with more of the Alcohol Ink and made some little labels using Tim stamps... adding a smidge of Alcohol Ink to the labels and corks to make the bottles look well used.  I wanted to add some kind of spider web to the frame but was puzzling over what to stamp it with... when all of a sudden, like a bolt of the proverbial, I hit on the idea of stamping with Ranger's Glue & Seal and then sprinkling the new Rock Candy Dry Stickles over the top... it worked! I am chuffed about that!


The Bats are stamped onto Grungepaper, coloured with Pumice Stone and Black Soot Distress Ink and then curled to make them look like they are flapping about.  The Skull and Tombstone are both stamped onto white card and cut out. The Skull has a smidge of Black Soot DI to make him a bit less standy=outy and the Tombstone has been snipped down the side and folded so it looks a bit more 3D.  I coloured this with Pumice Stone and Black Soot DI.   Kitty is a little cutie isn't he?  He has been stamped twice, I layered up his head and back legs, adding a couple of brads so he is a bit mobile and then 3D'd him onto the frame.  Finally, another couple of spiders.  The first one is cut from Clearly for Art Blackout using an Alterations die and heated to curl the legs a bit.  The other one is from my pack of Hallowe'en critters from the £1 shop.


And there you have it.  I have been trying to think of ways to get some kind of lantern light into the box but struck a big fat blank... if I was handy with a drill I might have drilled holes and added fairy lights just poking through but I am rubbish with anything that may cause skin to be cut lol  OOoooh and whilst I think on, you still have a couple of days to enter this months giveaway... all the deets are HERE for that.  Thanks for looking... Happy Haunting!  TTFN


^0v0^ ^0v0^ ^0v0^ ^0v0^ ^0v0^ ^0v0^ ^0v0^ ^0v0^ ^0v0^ ^0v0^ ^0v0^ ^0v0^ ^0v0^

Monday 15 October 2012

Hallowe'en Part 1 From Hels

Hellllooooo and happy *nearly* Hallowe'en from me.  As you will probably be aware, the DT have been playing with those  amazing All Hallow's Eve papers from Carta Bella and those scrummy Hallowe'en Blueprint stamps from Tim Holtz for our DT kits this month.   I got myself all excited when I first saw the papers... they are L U  S H!  But when I felt them... well, I got all unnecessary because they are very finely textured and an absolute dream to work with.  The other thing that I really loves about them is that they are not orange.  I know orange is a traditional Hallowe'en colour, how refreshing to have papers that haven't got that though, brings in a whole new way of looking at things.


My first project this month is an altered papier mache H.  H is, of course, for Hallowe'en and I do love to do 3d alterable stuff so this little fella was perfect.  I chopped up some of the papers (I know, I had to be very brave for that part) and then randomly glued them all over the H.  Once the H was completely covered, I popped some Traditional Tan paint onto my craft sheet, spritzed it with water and then smooshed it all over the H with some Cut & Dry foam.  This dulls down the over all patterns without obscuring them and just gives the piece a smoother overall look.


Once that had dried, I whizzed around the edges, every so casual like, nothing needs to be perfect for this kind of altered piece, with some Pitch Black Paint Dabber.  Once this was dry I got some Ranger Glue & Seal and painted the H all over.  Glue & Seal is a brilliant product, yes it does exactly as the name would suggest, it is a fine paper glue but I use it more for sealing my paper projects.  This protects them from fading and from getting grubby but it also means that you can add spritzes and sprays without fear of it soaking into the paper too much.


Talking of spritzes... I used my ever so favourite Black Marble Dylusions spray to add some cool black spiders blood streaks and splatters... the closer you spray, the better the drips will be... and I also sort of shook the bottle at the H, the residue of the black in the nozzle will drop out to add some more splats too.


The black looked good but it needed something else... something a bit rusty looking... so I used Ancient Copper Cosmic Shimmer Spray and spritzed up close to the surface for an intense hit of rusty blingyness.   All that done I got on with the embellishing.  The bats are from the stamp set, stamped onto Grungepaper with Archival Ink, cut out and then inked with Pumice Stone and Black Soot Distress Ink.  I curled their wings a bit to make them a bit more flappy.  The spider is from a goody bag I got in the £ shop for...erm... 99p (ahem, quite)  He is a big old ugly looking thing and I positioned him so he was creeping up over the side of the H.  Using a glue gun to make a web for him was the genius idea from Gillian (credit where it is due and all that!)


The finishing touches are some clay pumpkins I made and the skelington... he is a dandy looking chap isn't he!!!    I am really chuffed with how this turned out... better than I had expected... and it is all down to those gorgeous papers, they are the basis for my ideas and inspiration.  For more info about the DT kit and how to get your hands on a set, please CLICK HERE because Snazzy's are now selling the exact same DT kits we are given...and... even better... there is a 10% discount if you order them together!  Do scroll back through the month too because all the totes-amazeballs projects that the rest of the team have made are all here for you to see too. 


And finally... if you would like to be in with a chance of winning this months random comment prize, please CLICK HERE.

Thanks for looking... I will be back later in the week with my other offerings :O))  TTFN


^0v0^ ^0v0^ ^0v0^ ^0v0^ ^0v0^ ^0v0^ ^0v0^ ^0v0^ ^0v0^ ^0v0^ ^0v0^ ^0v0^ ^0v0^

Thursday 11 October 2012

DT Project # 2 by Astrid

Featuring Tim Holtz "Halloween Blueprint" stamps & Carta Bella "All Hallow's Eve" paper collection

Hello everyone, I'm back with my second project for this week. This time I decided to make a foldout tag holder that could be used as a Halloween gift for a special friend.


This is how I went about making it:
1. For the holder, cut a strip of Brown A4 Kraft card 12 cm wide length wise and score at 9.5 cm, and 12.5 cm along the long side.


2. Shape the shortest end piece for the flap, either with a die, a template or you could even just sketch a shape by hand.


3. Cut 3 pieces of one of the papers to 0.5 smaller than your 3 panels, sand the edges to bring out the white core of the paper and then ink them a bit. I used Dusty Concord Distress Inks. I also added a few spritzes of Ancient Copper Cosmic Shimmer mist. Glue to the outside of the holder and then add two brads for the closure. Do this before lining the inside of the holder!


4. For the inside, choose a different paper and line as before, I used the same inks and spray to alter the paper a bit. I created a pocket for the tag with a Tim Holtz Movers and Shapers die and then used one of the Tim Holtz Blue print stamps, embossed with Wow Vanilla White embossing powder. I darkened the edges a bit with some Dusty Concord and added a bit of colour with Rusty Hinge Distress Ink. I also added some bits from the sticker sheet that comes with the collection.


5. The bottom and top flaps were decorated in similar ways:


I used a white pen to add eyes to the cat and give it a bit of definition. Here you can see the whole inside:


6. The tag was made with a Manila Tag, cut a bit shorter to fit in the pocket. I Inked it with the same two inks and I also used a small chicken wire stencil to add a bit more interest. Again I embellished with stickers from the collection.


The final step was to embellish the outside with some little sprocket grears and other steampunky bits. Snazzys stock their own collection of these! The holder can be closed with some raffia wrapped wire wound around the two brads. Here you can see the tag inside the holder:


Well that's it from me for this month. Don't forget to come back on Monday when the wonderful Hels will have some amazing projects to show you!


Monday 8 October 2012

DT Project 1 by Astrid

Featuring Stampers Anonymous Tim Holtz 
"Halloween Blueprint" stamps & Carta Bella "All Hallow's Eve" paper collection


Hello everyone and welcome to this week's projects using these wonderful products. 
If you are a regular here you will have seen all the marvelous projects my teamies have made this month already. If not, make sure to scroll down and have a look. There is even a chance of winning some awesome Halloween goodies by leaving a comment HERE.

Well, on to my first project, - I decided to make some Halloween wall art, using both the papers and the stamps.

Unfortunately I got so caught up in the process of creating it that I forgot to take photos of the early stages, so I'll just have to talk you through it.

I started with a piece of 8 x 8" chipboard from my stash. I then cut random strips of a variety of the papers and glued them onto the chipboard. The next step was that I covered it all with a thin layer of Gesso to tie it all together. I added some bits of wasi tape and some Tim, Holtz tissue tape in random places to add more interest. Next I used the stamps with Black Archival Ink. Time for a focal image, - I chose a Halloween photo from my stash, - a freebie from LandofNod studios, you can find it here if you are interested. I glued it on, covered it with a baby wipe and then sprayed various colours of Perfect Pearls Mists and some Dylusions Inks. I then added some stamping still with a chicken wire stamp from my stash.
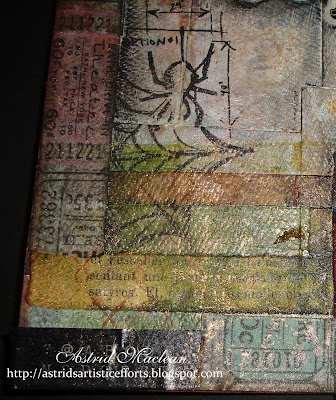
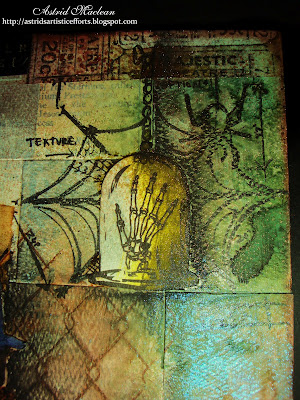
I embellished with some of the stickers that come with the paper collection and shaded around them with black charcoal pencil for extra impact. Here are some close up photos. The papers have wonderful texture that really bring out the various inks and sprays.

Here you can see the wonderful texture of the papers

One of the elements that come with the papers, I added some doodling to make it look as if it was hanging.

There are two sets of letters that come on one of the sheets, great for adding journaling. The letters at the top are wasi tape though.
Now for the final touch. I felt it needed a bit more red to pick up the red in the photo, so I decided to give the witch a rose in her mouth for a whimsical touch:o)


Well that's it for now but I'll be back on Thursday with another project. If you are ineterested, you can order the DT pack HERE


Hope you enjoyed this project and hopefully see you Thursday.